4 Acupressure Points for relaxing tension in the feet- Walk better
Acupressure points unlock the map for Manual Therapy of Lower Extremities and Feet
Acupressure points connect to unlock tension and pain in the lower extremities. Chronic pain and tension in th lower body—whether from prolonged standing, athletic strain, or sedentary tightness—affect millions. While rest and stretching help, targeted manual therapy using acupressure and trigger point techniques offers a precise, evidence-
informed approach to relief. The feet and lower legs are particularly powerful maps of the body’s tension patterns, containing reflex connections, major acupressure channels, and myofascial trigger points that refer pain elsewhere.
This guide explores key points from the knees to the toes, explains the difference between acupressure and trigger point methods, and provides safe, effective techniques for self-care or clinical application.
—
Acupressure Points Key in the Lower Extremities & Feet
Acupressure follows traditional Chinese medicine (TCM) meridians. For lower limb pain and tension, four points are consistently effective:
1. Stomach 36 (ST-36) – “Leg Three Miles”
· Location: Four finger-widths below the kneecap, one finger-width lateral to the tibia, in the tibialis anterior muscle.
· Uses: Generalized fatigue, digestive sluggishness, knee pain, and leg heaviness.
· Why it works: Powerful for systemic energy (Qi) and local muscle recovery.
2. Spleen 6 (SP-6) – “Three Yin Intersection”
· Location: Three finger-widths above the medial malleolus (inner ankle bone), just behind the tibia.
· Uses: Pelvic tension, insomnia, medial knee pain, and lower leg edema.
· Caution: Avoid during pregnancy.
3. Liver 3 (LV-3) – “Great Rushing”
· Location: On the dorsum of the foot, in the depression between the first and second metatarsals.
· Uses: Stress-related tension, headaches referred from the feet, and plantar fascia tightness.
4. Kidney 1 (KD-1) – “Gushing Spring”
· Location: On the sole, in the depression just proximal to the second and third toe webs, one-third of the foot length from the toes.
· Uses: Ankle tension, grounding, and fatigue from standing.
—
Common Trigger Points in the Lower Leg & Foot (Myofascial Pain)
Unlike acupressure’s meridian-based map, trigger points are hyperirritable knots in taut muscle bands that refer pain predictably. The following are high-yield for tension relief:
Muscle Trigger Point Location Referral Pattern
Gastrocnemius Medial or lateral belly, mid-belly Posterior knee, mid-calf, arch of foot
Soleus Deep in distal calf, 3-5 cm above Achilles Heel, sacroiliac region, posterior shin
Tibialis anterior Upper third, lateral to tibial shaft Medial dorsal foot, great toe
Flexor digitorum brevis Mid-arch of sole (tender nodule) Second–fourth toes, burning in ball of foot
Abductor hallucis Medial arch, just distal to heel Medial heel pain (mimics plantar fasciitis)
Check are what Cleveland Clinic says about trigger point massage.
—https://health.clevelandclinic.org/trigger-point-massage
Acupressure Points Manual Techniques: How to Work
These methods apply to both acupressure points and trigger points. Use a firm, lubricated thumb, knuckle, or a tool like a massage ball or foam roller.
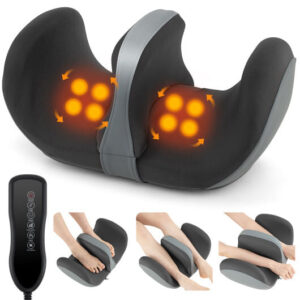
Several massage products can help alleviate tightness and aching in the feet and extremities. The link following will take you to the item https://www.wengzenstore.com/product/foot-and-calf-massager-with-heat-gift-for-women-men-mom-dad-gray/https://www.wengzenstore.com/product/foot-and-calf-massager-with-heat-gift-for-women-men-mom-dad-gray/
1. Static Compression (Ischemic Pressure)
· How: Locate point. Apply steady, perpendicular pressure to a level of “comfortable discomfort” (6–7/10 on a pain scale).
· Duration: 30–90 seconds. Release slowly.
· Best for: LV-3, ST-36, or gastrocnemius trigger points.
2. Friction Stripping (Longitudinal)
· How: Along the muscle fiber direction (e.g., tibialis anterior), use thumb pads to glide across the knot with moderate depth.
· Repetitions: 6–10 strokes, 30 sec rest.
· Best for: Soleus and tibialis anterior points.
3. Reciprocal Inhibition Stretch After Pressure
· How: After releasing a flexor point (e.g., abductor hallucis), immediately stretch the antagonist (e.g., toe extensors).
· Why: Increases range of motion and prolongs pain relief.
4. Circular Acupressure
· How: For ST-36 or SP-6, use small clockwise circles with the thumb pad, then 20 sec direct pressure.
· Use: To boost energy and reduce dull, achy tension.
—

Acupressure Points :10-Minute Lower Extremity Protocol
Preparation: Seated, with the ankle crossed over the opposite knee. Use lotion or not; dry pressure works but increases friction.
1. KD-1 – Thumb compression, 1 min each foot.
2. LV-3 – Deep static pressure, breathe slowly, 45 sec each side.
3. SP-6 – Circular acupressure, then static hold, 1 min each.
4. Gastrocnemius trigger point – Locate tender spot mid-belly; use knuckle or ball against floor; 2 min total.
5. Soleus strip – Friction strip from mid-calf to Achilles, 5 passes each leg.
6. ST-36 – Final firm hold, 1 min each leg.
Finish with ankle rotations and toe spreading.
—
Safety & Professional Considerations
· Contraindications: Acute deep vein thrombosis (DVT), open wounds, fractures, cellulitis, or severe varicose veins over the point. Avoid deep pressure in pregnancy on SP-6 or lower abdomen/ankle reflexes.
· Expected sensation: “Good hurt” (e.g., dull ache, referred warmth, twitch response) – never sharp, radiating electric, or lingering pain >30 min.
· Frequency: Self-treatment 3–5x/week; professional treatment once weekly for chronic tension.
—
Final Thought
The lower extremities are both the body’s shock absorbers and its propulsion system. Integrating acupressure’s meridian logic with trigger point’s neuro-muscular precision offers a robust toolkit for pain and tension—whether for your own recovery or for clients. Start with one point, listen to the tissue response, and refine pressure accordingly
.
When in doubt, go slower and shallower. The most profound releases often come from the gentlest hold.
For educational purposes only. If persistent pain see a healthcare provider. Assisted with AI.

Shop With Confidence ✔ 30-Day Money-Back Guarantee ✔ Safe & Secure Checkout ✔ Real Customer Support ✔ Quality You Can Trust